How To Change The Sand In Your Pool Filter: Step-by-Step Guide

Jafar Dhada

Welcome to our comprehensive guide on an essential aspect of pool maintenance – changing the sand in your pool filter.

As a pool service professional, we know that your pool is more than just a place to cool off during the summer; it’s a hub of enjoyment and relaxation for your family.

Maintaining its pristine condition is vital to prolonging those happy moments, and that’s where changing the sand in your pool filter comes into play.

Change Sand in Filters - Step by Step Guide

The sand in your pool filter is crucial in keeping your pool water clear and clean.

Over time, this sand becomes clogged with debris and loses its effectiveness in trapping and removing impurities.

This is why it is necessary to replace the sand regularly. Failing to do so may result in cloudy water and create an environment conducive to algae growth and other unwanted contaminants.

In this guide, we’ll provide the following:

  • A detailed overview of the steps involved in changing the pool filter sand.
  • Demystifying the process.
  • Offering practical tips to make this task as easy as possible.

We understand that pool maintenance can seem daunting, but we assure you that it becomes a manageable and even satisfying task with the proper guidance.

Regarding time requirements, expect changing the sand in your pool filter to take several hours.

However, this investment of time could be more frequent. Under normal circumstances, we recommend changing the sand in your pool filter every 5-7 years. Yet, the exact frequency will depend on the usage of your pool and the condition of your current sand filter.

Tools & Materials Needed

Before diving into the step-by-step guide, it’s crucial to be prepared with all the necessary tools and materials to change the sand in your pool filter.

Here’s a handy checklist to ensure you have everything you need:

Pool-Maintenance-Tools

  1. Replacement Filter Sand: Choosing the correct type and grade of sand for your pool filter is imperative. Glass media has emerged as a popular alternative to traditional sand in pool filters. Discover the benefits of using glass media and why it’s gaining traction in the industry for its superior filtration capabilities and longer lifespan.
  2. Protective Gloves and Goggles: Safety is paramount in every maintenance task. Wearing gloves will protect your hands from abrasions, and goggles keep your eyes safe from dust or sand particles.
  3. Garden Hose: This will be used to clean the tank’s inside and the filter’s individual parts.
  4. Screwdriver/Wrench Set: You’ll need this to remove and reattach the filter parts. The type of tool required will depend on your specific pool filter model.
  5. Shop Vacuum: This can be useful for removing the old sand from your filter, but it isn’t mandatory. A small scoop or cup will do if you don’t have one.
  6. Plumber’s Tape: This is used to secure connections and prevent leaks when reassembling the filter.
  7. Bucket: A simple bucket will come in handy for transporting old sand and adding new sand to the filter.

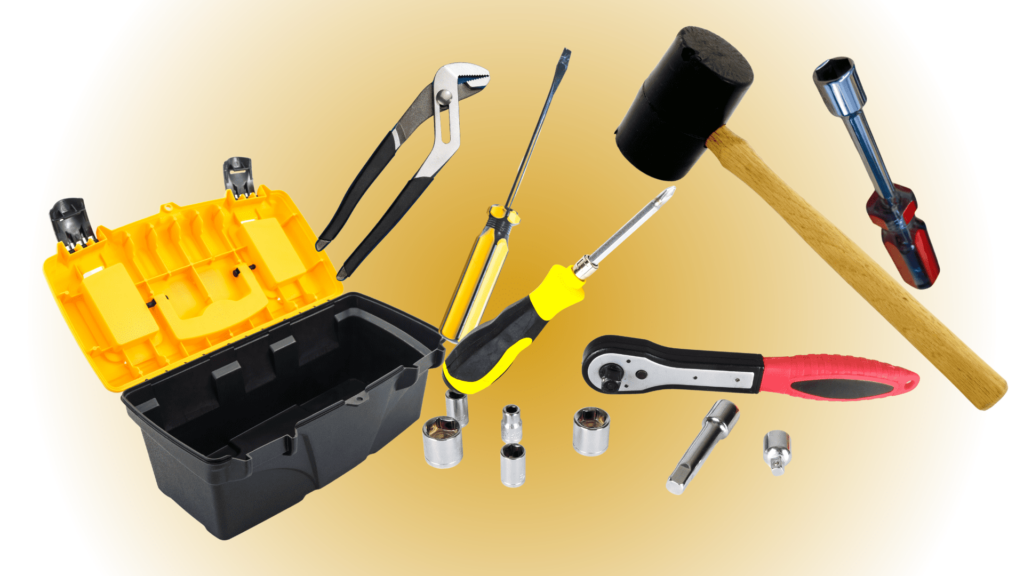
You can purchase most of these materials from a local pool supply store or online from reputable pool equipment retailers. Remember, investing in high-quality materials and tools makes the job easier and contributes to the longevity and effectiveness of your pool filter.

When buying pool filter sand, check its compatibility with your specific filter model. Not all filters use the same type of sand. Therefore, consulting your filter’s manual or getting advice from pool service professionals like ourselves can be beneficial.

With the right tools and materials at your disposal, you’ll be well-prepared to change the sand in your pool filter. In the next section, we’ll discuss safety precautions to protect you during this process.

Safety Precautions

Safety-First

Safety Precautions

Safety is paramount in every aspect of pool maintenance, including when changing the sand in your pool filter.

Here are some crucial safety tips to keep in mind before you begin this process:

  1. Shut Off The Pool Pump: Before you start working on your pool filter, ensure the pool pump is completely shut off. This is a safety measure and a necessity for the task at hand. For added safety, we recommend turning off the pump at the switch and unplugging it or turning off the circuit breaker that powers it.
  2. Use Protective Equipment: Always wear protective equipment such as goggles and gloves during the process. This will protect your eyes from flying sand particles and your hands from rough surfaces or edges.
  3. Handle Tools with Care: Be careful when using tools to remove or replace parts of the filter. Mishandling of tools can lead to injuries.
  4. Follow Instructions: Whether it’s the instruction manual for your specific filter model or this guide, always follow the recommended procedures to ensure your safety and the task’s success.
  5. Never Rush: Changing the sand in your pool filter isn’t a process that should be rushed. It requires patience and precision. Hastiness can result in injuries or errors in the task.
  6. Proper Disposal of Old Sand: Be sure to dispose of the old sand in an environmentally friendly manner. Check your local regulations for guidance.

As pool service experts, we cannot stress enough the importance of these safety measures. They are meant to protect you and ensure the process goes smoothly.

Now, with the right tools and safety measures in place, let’s get into the step-by-step guide on changing the sand in your pool filter.

Step-By-Step Guide to Changing Pool Filter Sand

As we embark on this critical pool maintenance task, we’ll guide you through each step with detail and precision. With the right tools, safety measures, and an expert guide, you can effectively and efficiently change the sand in your pool filter.

Step 1: Drain The Pool Filter

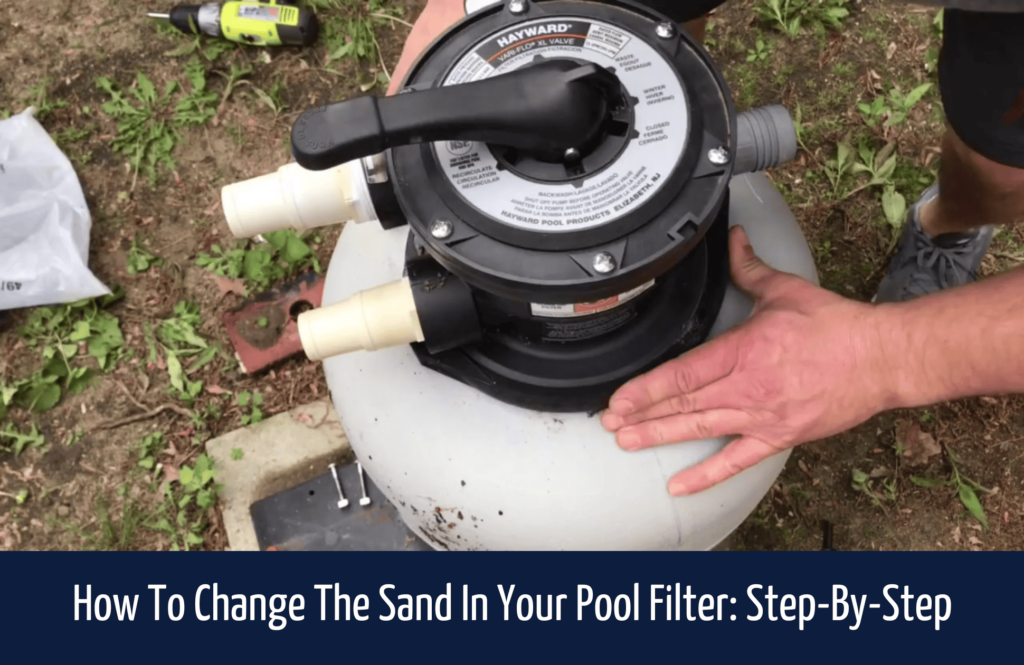
Draining the pool filter is the first crucial step in this process.

To ensure a thorough and effective sand replacement, it is important to properly drain the water from the sand filter.

Here’s how to do it correctly:

  1. Locate the Drain Plug: Most sand filters have a drain plug at the bottom of the filter tank. This plug allows for complete drainage of water from the filter and facilitates the drying of the sand.
  2. Open the Drain Plug: Use a wrench or pliers to carefully loosen and open the drain plug. Ensure you have a bucket or suitable container ready to collect the water as it drains out. Opening the drain plug allows the water to fully drain from the filter.
  3. Allow the Sand to Dry (Optional): Once the water has drained, you may let the sand dry before proceeding further. This can make it easier to vacuum the sand during removal.

These steps will ensure that you have safely and effectively drained the water from your pool filter, setting the stage for removing and replacing the old sand.

Remember, every pool filter is unique, so your valve might not have the same labels as described here. Always refer to your filter’s manual if unsure about the valve settings.

Step 2: Remove The Filter

Now that you’ve safely drained the pool filter, it’s time to get down to the nitty-gritty and remove the filter for sand replacement.

While this might sound daunting, rest assured that it is a manageable task with the right steps.

  • Unscrew the Collar or Clamp: Filters are typically held in place by a collar or clamp around the center. Use your screwdriver or wrench to loosen this. Remember to keep all screws or nuts in a safe place for reassembly later.
  • Remove the Multiport Valve: Once the collar or clamp is loose, gently lift the multiport valve off the top of the tank. Be cautious not to pull too hard on the connected pipes; you don’t want to damage them.
  • Check and Remove the Standpipe: In the center of the tank, you’ll see a long plastic tube known as the standpipe. It’s crucial to ensure it stays intact during the process. Some filters allow the standpipe to be removed, while others don’t. If your standpipe can be removed, take it out carefully and set it aside in a safe place.
  • Cover the Standpipe: If it cannot be removed, or once it’s reinserted, you’ll need to cover it to prevent sand from getting into it during the replacement process. A simple way to do this is to use a cup or similar object and duct tape to secure it.

We recommend taking photos or making notes before disassembly. This will make it much easier to reassemble the filter later. It’s all about being patient and organized.

Step 3: Clean Out The Old Sand

Now that you’ve successfully removed the filter, it’s time to clean the old sand. Remember, this sand has served its purpose, filtering countless gallons of water, and now it’s time to retire it.

  • Removing the Old Sand: Use a shop vacuum if you have one. It can make the job a lot easier and faster. If you don’t have a shop vacuum, use a small scoop or cup to manually remove the sand. Be careful not to damage the laterals at the filter tank’s bottom. They are usually made of plastic and can be easily broken.
  • Cleaning the Tank: Once you’ve removed the bulk of the sand, use a garden hose to clean the remaining sand and debris from the tank. Take your time to thoroughly clean the inside of the tank.
  • Inspect the Laterals: Now is also an excellent time to inspect the laterals (small pipe-like structures at the bottom of the tank) for any damage. If you see any cracks or breaks, you must replace them before adding the new sand.

In terms of disposal, old pool filter sand can often be used in landscaping or gardening as long as it is not contaminated with pool chemicals. However, your local waste management facility can provide the best advice on proper disposal in your area. Do not simply dump the sand, as it could harm the environment.

Step 4: Inspect The Pool Filter

With the old sand removed and the tank cleaned, this is the perfect time to thoroughly inspect your pool filter. Identifying and addressing any issues at this stage can prevent future problems and ensure the filter performs optimally with its fresh load of sand.

Here’s what to look for during the inspection:

  • Inspect the Laterals: As mentioned in the previous step, the laterals are delicate components critical in filtering your pool water. They’re located at the bottom of the filter, and any cracks or breaks in them will allow sand to escape into the pool. Inspect each lateral carefully for any sign of damage. If you find any broken laterals, they must be replaced before proceeding.
  • Check the Standpipe: Ensure that the standpipe – the long plastic tube in the center of the tank – is not cracked, broken, or loose. If there’s any damage, it could lead to malfunctions in the filtration process.
  • Examine the Tank: Take a good look at the inside of the tank. Check for any signs of wear, cracks, or corrosion. While these tanks are designed to last, they can deteriorate over time, especially if the pool’s chemical balance isn’t properly maintained.
  • Inspect the Multiport Valve: Check the multiport valve (the component you removed at the top of the tank) for any signs of wear or damage, especially to the O-ring seal. A worn or damaged O-ring can lead to leaks.
  • Check the Pressure Gauge: Finally, look at the pressure gauge. It should be clean and clear, with no cracks or leaks. A faulty pressure gauge could lead to incorrect readings and improper filter maintenance.

By carrying out a thorough inspection, you’re preparing to replace the sand and proactively maintaining the entire filtration system.

Step 5: Add New Sand

With the filter cleaned and inspected, we’ve arrived at a critical juncture: adding the new sand. While this step might sound straightforward, it’s essential to do it correctly to ensure your filter works effectively.

  1. Choosing the Right Sand: The first step is to use the correct sand for your pool filter. Generally, #20 silica sand is the most commonly used type, specifically processed to trap particles in your pool water. The sand granules should be between 0.45 to 0.55 mm, the optimal size for pool filtration.
  2. Add a Base Layer of Sand: Add sand to the tank with the standpipe protected (to prevent sand from getting in). Adding a small amount (around one-quarter of the total) is best to cover the laterals and provide a base layer.
  3. Fill the Tank: Add sand until the tank is about half-full. Adding water to the tank until it’s full is a good idea. This helps cushion the laterals as you add the remaining sand.
  4. Finish Adding Sand: Continue adding sand until it reaches the level recommended by the manufacturer (usually a certain height up the filter tank). Be careful to fill the filter evenly, which can lead to poor filtration performance or even damage the filter.
  5. Check Sand Level: The sand level should be at or slightly above the top of the laterals or the indicated level in your filter’s manual. Refrain from filling the filter with sand; there must be enough space left for the sand to move and do its filtering job.

It’s important to remember that not all pool filters use sand; even among sand filters, there can be differences. Always consult your filter’s manual or seek advice from pool service professionals like us if you’re unsure about the sand type or quantity to use.

Step 6: Reassemble The Pool Filter

Having successfully replaced the sand, it’s time to reassemble the pool filter and reattach it to the pool system. This step requires precision and care to ensure everything fits together correctly and the system works efficiently.

  1. Reinstall the Multiport Valve: Begin by carefully placing the multiport valve back onto the top of the tank. Ensure the standpipe fits snugly into the bottom of the valve. Double-check the O-ring is in good condition and properly seated.
  2. Secure the Collar or Clamp: Once the multiport valve is in place, secure the collar or clamp that holds it to the tank. Be sure to tighten it evenly, but don’t overtighten it, as this could potentially crack the tank or valve.
  3. Reconnect any Detached Pipes: If you had to disconnect any pipes when you removed the multiport valve, now is the time to reconnect them. Use Teflon tape on the threads of any pipe fittings to ensure a good seal and prevent leaks.
  4. Add Water to the Pool: If the water level in the pool is below the skimmer line due to the backwash process, now is the time to add water to the pool to bring it up to the proper level.
  5. Check for Leaks: With everything reassembled, turn on the pump and check for any leaks around the reattached pipes or the multiport valve. If everything is dry, then you’ve successfully reassembled your pool filter!

Reassembling the pool filter is the last major step in the process. The final step will involve getting your pool filter system back up and running and checking to ensure everything works as it should.

Step 7: Backwash The New Sand

You’ve made it to the final step of the process. Congratulations! Before you start enjoying your sparkling clean pool, there’s one last step to complete: backwashing the new sand. This critical step removes any fine silts or dust from the new sand that could cloud your pool water.

  • Why Backwash: Fresh sand often contains tiny particles that can pass through the filter and back into your pool, causing cloudiness. Backwashing runs water in reverse through the filter, flushing out these impurities before you begin regular filtering operations.
  • Set to Backwash: To begin, ensure your pump is turned off. Then, set your filter valve to the ‘backwash’ position. Safety is key; never change the valve setting while running the pump.
  • Turn on the Pump: With the valve set to ‘backwash,’ turn your pump back on. Water will flow in reverse through your filter, out through your backwash hose, and away from your pool.
  • Run the Backwash Cycle: Allow the backwash cycle to run until the sight glass on your filter (or the water exiting the backwash hose) is clear. This usually takes a few minutes, meaning the fine particles have been rinsed out of your new sand.
  • Rinse the Filter: After backwashing, turn off the pump again and set the valve to the ‘rinse’ position. Turn on the pump for another cycle (usually about 20-30 seconds). This recompacts the sand and removes any remaining debris before you return to the normal filtration mode.
  • Return to Filter Mode: Once the rinse cycle is complete, turn off the pump again, then set the valve back to the ‘filter’ position. Turn the pump back on, and your filter is ready!

Remember, backwashing prepares new sand for operation and is a regular maintenance task you should perform whenever the pressure gauge indicates it’s needed. It helps keep your filter working effectively and your pool water crystal clear.

With this final step, you’ve successfully changed the sand in your pool filter.

Step 8: Rinse and Restart the System

After all the hard work, it’s time to rinse and restart your pool filtration system. Following a sand replacement, this procedure is critical for ensuring that your system’s components work seamlessly and that your pool is ready for use.

  • Rinse Cycle: Following the backwash process, it’s time to run a rinse cycle. Turn off the pump, switch the valve setting to ‘rinse,’ and then turn the pump back on. Let it run for about a minute. This step ensures that any remaining debris is rinsed out of the filter and into the drain, not your pool.
  • Return to Filter Mode: After the rinse cycle, turn the pump off again and set the valve to ‘filter.’ This is the standard operating mode for your pool filter.
  • Restart the Pump: Now, it’s time to turn your pump back on. With the system in ‘filter’ mode, water will begin flowing through your newly refreshed sand filter, providing clean, clear water for your pool.
  • Monitor the System: After restarting, monitoring your pool and filtration system closely for a few days is essential. Keep an eye on the pressure gauge and water clarity. The pressure should stay within the normal operating range, and your water should be clear. If you notice any significant changes, it may be a sign that something isn’t working correctly.
  • Enjoy Your Pool: You’ve completed the process with the system running smoothly! Your pool is now ready for you and your family to enjoy.

Changing the sand in your pool filter is not an everyday task, but it’s crucial for the long-term health of your pool.

You’ve better understood how your pool operates by doing this work yourself. So here’s to clear, refreshing water and the satisfaction of a job well done!

Common Mistakes to Avoid

Even for seasoned pool owners, changing the sand in a pool filter can have challenges.

However, being aware of common mistakes can help you avoid them and ensure the process goes smoothly.

  • Using the Wrong Sand: Not all sand is equal in your pool filter. Using play sand, beach sand, or any other type of sand other than pool filter sand can cause your system to function poorly and could even damage the filter. Always use #20 silica sand, designed explicitly for pool filters.
  • Skipping the Backwash and Rinse Cycles: You might be eager to get your pool up and running immediately after adding new sand. But make sure to complete the backwash and rinse cycles. These steps are crucial for flushing out fine sand particles and debris, ensuring clean and clear water.
  • Not Inspecting or Cleaning the Filter Components: Replacing the sand in your pool filter is the perfect opportunity to inspect and clean all filter parts. It’s a mistake to overlook this chance. Check the laterals, standpipe, multiport valve, and tank for any signs of damage or wear.
  • Overfilling or Underfilling the Tank: Your pool filter tank needs the right amount of sand to function correctly. Overfilling or underfilling can lead to inefficient filtration and potential damage. Always consult your filter’s manual to know the correct amount of sand required.
  • Failing to Monitor After Restart: Once you’ve replaced the sand and restarted your system, keeping a close eye on your pool and the filtration system is crucial. Failing to do so may result in missed signs of potential issues. Regular pressure gauge and water clarity checks can help identify any problems early on.

By steering clear of these common mistakes, you’re setting yourself up for success in maintaining a healthy and clean pool.

Always remember that each pool and its accompanying system are unique, so when in doubt, feel free to consult with a pool service professional like us.

Maintaining Your Pool Filter

Congratulations on successfully changing the sand in your pool filter!

Now, let’s focus on maintaining your filter in top condition. By following a few key tips, you can extend the lifespan of your filter and ensure optimal performance.

  1. Regular Cleaning and Backwashing: Even with new sand, your pool filter will accumulate debris over time. Set a regular schedule for cleaning and backwashing to prevent clogging and maintain efficient filtration. Generally, backwashing is recommended when the pressure gauge shows an increase of 8 to 10 psi above the starting pressure.
  2. Monitor Pressure Gauge: Keep a close eye on your filter’s pressure gauge. It serves as an indicator of how well your system is operating. An excessively high reading indicates a dirty or clogged filter, while a consistently low reading could indicate a problem with the pump. Regularly checking the pressure gauge will help you detect issues early on.
  3. Proper Chemical Balance: Maintaining the proper chemical balance in your pool water is vital for the longevity of your filter. Imbalanced water can lead to scale or corrosion, negatively impacting the filter’s performance. Regularly test and balance your pool water’s pH, chlorine, and alkalinity levels.
  4. Schedule Professional Inspections: While regular maintenance is essential, it’s also wise to schedule periodic professional inspections. A pool service expert can assess the overall health of your pool system, including the filter. They can identify any potential issues and perform necessary maintenance or repairs.
  5. Know Your Filter’s Lifespan: While sand replacement is typically required every 5 to 7 years, it’s essential to consult your filter’s manual for specific guidelines. Some filters may require frequent sand changes based on usage or water conditions. Knowing your filter’s lifespan will help you plan and budget for future replacements.

Following these maintenance tips and staying proactive ensure your pool filter remains in optimal condition.

Remember, a well-maintained filter leads to cleaner water, reduced maintenance costs, and an enjoyable swimming experience.

Frequently Asked Questions

As pool service experts, we often encounter questions regarding pool filter sand changes.

To address some common concerns, we’ve compiled a list of frequently asked questions and their answers:

How often should I change the sand in my pool filter? 

The general recommendation is to change the sand in your pool filter every 5 to 7 years. However, the frequency can vary based on pool usage, water conditions, and your filter type. Regular maintenance and monitoring of the performance of your filter can help determine when it’s time for a sand change.

Can I use any sand for my pool filter? 

No, using only sand designed explicitly for pool filters would be best. The most commonly recommended type is #20 silica sand. Other types of sand, such as play sand or beach sand, do not have the necessary properties for efficient filtration and can potentially damage your filter.

How do I know if my sand needs to be replaced? 

A few signs that indicate the need for sand replacement include decreased water clarity, increased pressure on the gauge, and reduced filtration efficiency. If you notice these symptoms or it has been several years since the last sand change, it’s likely time to replace the sand.

Can I reuse the existing sand during a sand change? 

Reusing the existing sand when changing your pool filter is generally not recommended. Over time, the sand becomes compacted, loses its filtration effectiveness, and accumulates debris. Starting fresh with new sand ensures optimal filtration performance.

Do I need to backwash and rinse after changing the sand? 

Yes, it’s crucial to backwash and rinse the filter after changing the sand. Backwashing flushes out any fine particles or debris from the new sand, and rinsing helps re-compact the sand and remove any remaining impurities.

Can I change the sand in my pool filter myself, or should I hire a professional? 

Changing the sand in a pool filter can be a DIY project for those with some experience and knowledge of pool maintenance. However, if you need clarification or are uncomfortable with the process, it’s always recommended to seek the assistance of a professional pool service provider. They have the expertise and tools to ensure the job is done correctly.

We hope these answers have clarified some common questions related to pool filter sand changes. If you have any additional inquiries or require further assistance, don’t hesitate to contact us.

Conclusion

In conclusion, changing the sand in your pool filter is a vital maintenance task that should be addressed. By replacing the sand at the appropriate intervals, you ensure the optimal performance of your pool filtration system, resulting in clean and clear water for your enjoyment.

Throughout this guide, we’ve emphasized the importance of proper maintenance, step-by-step instructions, and safety precautions. By following this comprehensive guide, you’ve taken a proactive step towards maintaining the health of your pool and prolonging its lifespan.

Remember, the sand in your pool filter is crucial in trapping impurities and keeping your pool water pristine. Over time, the sand becomes worn and less effective, so regular sand changes are necessary. Doing so prevents potential issues such as cloudy water, algae growth, and poor filtration.

We encourage you to use this guide as your go-to resource when changing the sand in your pool filter. By adhering to the steps outlined, utilizing the proper tools and materials, and maintaining a regular maintenance routine, you can ensure the longevity and efficiency of your pool filter.

If you have any questions or encounter difficulties during the process, don’t hesitate to contact our pool service experts. We provide guidance, support, and professional assistance to help you maintain your pool optimally.

Thank you for taking the time to prioritize the care of your pool. By following this guide, you’re investing in your pool’s long-term enjoyment and health, creating a refreshing oasis for you, your family, and your friends to enjoy for years.

Photo of author
Author
Jafar Dhada
Hey there, I am an avid swimming enthusiast coming from a coastal city in India. In my free time, I like to play snooker, and of course have a dive in the sea or a pool.